Building a Blog with Framer, Part 1: From the Basics to Publishing
How I built a blog with Framer, a no-code web builder. A walkthrough of using Framer, from the CMS, design system, responsive layouts, and SEO settings to publishing.
Series · Building a Blog with Framer (1/4)
Framer is a no-code web builder that lets you go from design to publishing without writing code. I built my blog in this order: manage posts in the CMS, make a design system, set up responsive layouts and SEO, and then publish with the Publish button. This post covers that process, along with the easy-to-miss parts of responsive design, which took me the longest.
Why I built a blog with Framer
Why I built my own instead of using an existing platform
There are plenty of platforms for writing: Medium, plus Korean platforms like Naver Blog, Brunch, and Tistory, and so on. With an existing platform, you don’t have to worry about SEO (search engine optimization), tracking visitors isn’t hard, and there’s hardly any maintenance. So if you ask, “Why bother building a website?”, part of the answer is small: I wanted something of my own that only I could make, not the same thing everyone else does. The other part is that I use Figma at work (and probably will going forward), and it suddenly made me wonder whether it’s really the best tool for the job.
I thought, “Shouldn’t a product designer know the different tools they might use at work in order to choose between them?” So I decided to learn Framer, which more and more people have been using lately. Building a site myself felt like the surest way to learn it, so that’s where I started.
What can you do with Framer?
With Framer, you can build a website with no code and no developer. If you use a template, practically anyone can build a website, even without a designer. (Of course, if you know code, you can use more detailed settings and features.)
In my case, I wanted to go through this whole process in Framer with as little development effort as possible: Design > Publishing > Writing and publishing content in the CMS > Managing SEO > Tracking visitors with Analytics. So I built the site using Framer’s tutorials as a reference.
How to use Framer: building a blog with Framer
Make the most of the Framer CMS
At first, I planned to design in Figma, bring it over with the Figma to Framer feature, and polish it in Framer. But designing directly in Framer using CMS data felt easier, so I decided to design in Framer from the start. (Though I started over several times before it felt easy!)
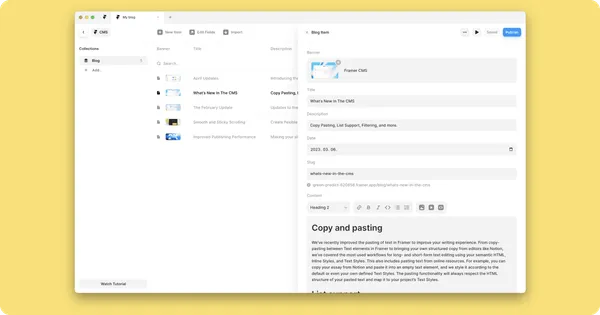
Framer’s CMS lets you write content and manage data in one place. You can use the same data everywhere, from the content list screen to the detail page.
You can decide which fields the CMS has, and add or remove fields as you need. I added a Category field for a future filter that sorts content by category, and a Date field to show when each post was written. You can set up whatever else you need through CMS editing.
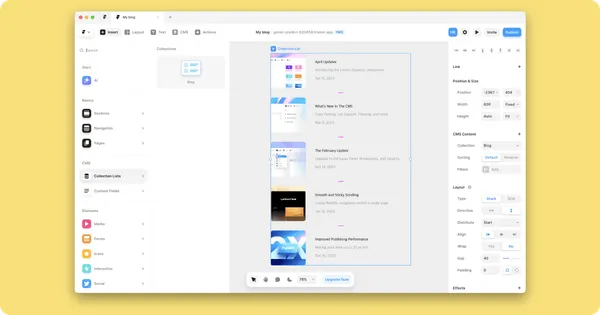
You can pull CMS data straight into the design canvas as a Blog Item and customize its design. You can add or remove the CMS fields you do or don’t want in the design component, and build different UI from the same data depending on the screen. I found this feature really handy.
Make a design system
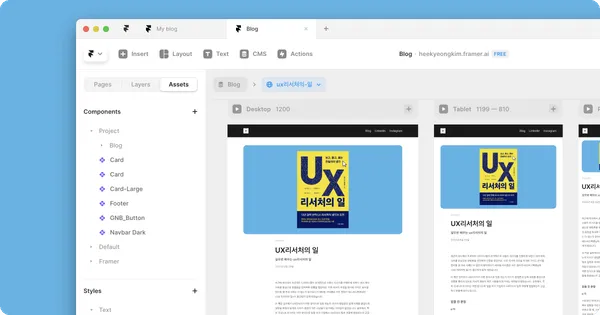
Just like building a design system in Figma and applying it to a product, you can make a color system, type system, and so on in Framer. I turned elements shared across every screen, like the GNB (global navigation bar) and the Footer, into components so they appear the same way on every screen.
Lay out the blog
Since most of what I’ll write is text-heavy, I thought hard about a layout that makes posts read “well.” For this part, I looked at Brunch and the tech blogs of various IT companies.
I spent quite a while deciding how to show the content list on the home page, whether I needed a separate list of all posts, how to structure the detail page, and how to handle desktop, tablet, and mobile layouts for all of these screens.
Now for the real work: responsive design
Because I was used to designing in Figma, it didn’t take me long to learn Framer itself while designing the layout. But when I thought I’d finished the whole design, the preview showed every layout breaking. The dread I felt…
The screens I’d drawn for each breakpoint weren’t the problem. What didn’t look natural were the interactions that connect the screens, and what happened when the window got larger than the screens I’d set, or smaller than the minimum. The problem was the Position values and Size options I hadn’t paid attention to on each element.
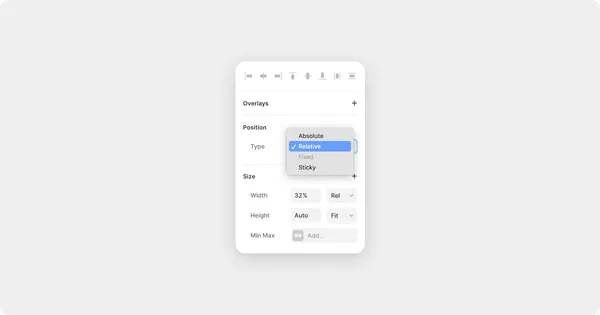
By setting things Figma doesn’t have, like Absolute and Relative in the Position option or Min width/height in the Size option, you can control how elements size and position themselves responsively.
Since I wasn’t familiar with these features, I changed the settings one by one to see how things looked on screen, which took quite a while. Luckily, I didn’t have many screens, so I was able to quickly fix the home, blog, and detail screens, plus three screens I plan to make public later, so that they all adapt naturally.
Set up SEO
One of Framer’s strengths is how easy it makes managing SEO. You can enter a slug for each piece of content in the CMS and edit page properties through Page settings, so setting up SEO was fairly easy.
(For details, I recommend Framer’s official SEO guide.)
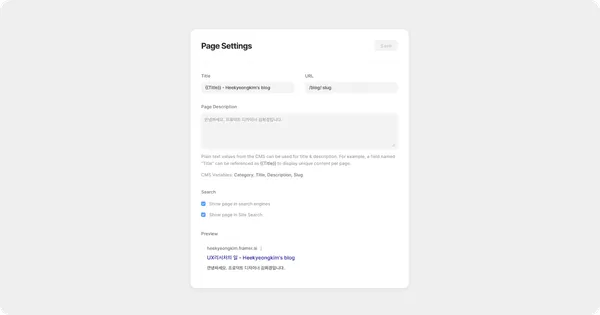
Publishing a Framer blog
Once the design is done, press Publish
Once you’ve finished the basic settings, the design, and some content, press the Publish button and your site finally goes live as a website anyone can see! If you didn’t set one up at the start, you’ll get a domain auto-generated by Framer.
After that, if you change the design or add content and then publish, you’ll notice the changes don’t show up on the website right away. That’s because Staging is turned on by default.
I recommend keeping Staging on if you can. After you publish, it lets you check once more whether you want the changes on your live site before deploying them.
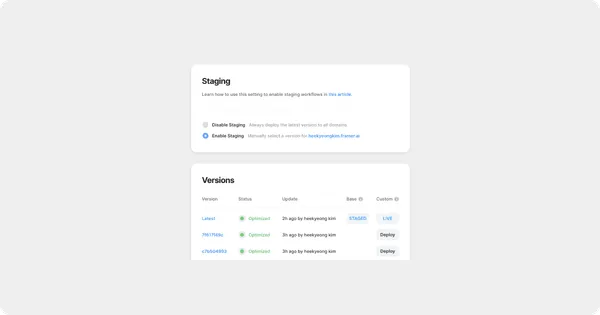
Go to Site settings > Staging & Versions, and among the versions (your publish history), press Deploy on the one you want. That version then becomes Live (applied to the actual website).
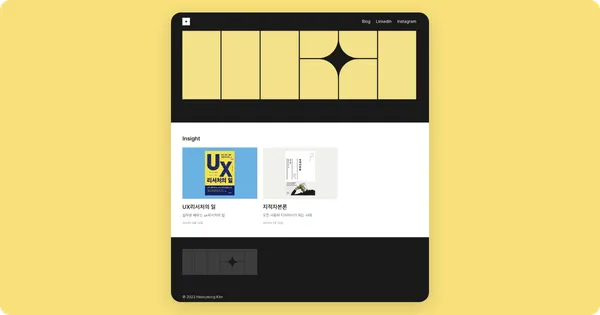
And just like that, you can see the blog you made on the web! (Finally, at last!!!)
Track visitors with Analytics
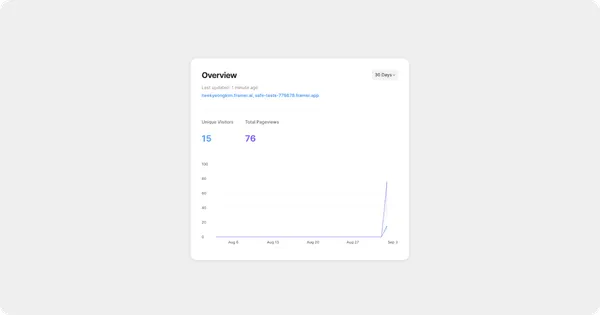
After publishing, Framer gives you tools for ongoing management. With Framer’s Analytics, you can see visitor counts split into Unique and Total, and check where people came from through Top sources. It’s simple, but these features were enough to make me pretty happy. (Upgrading to a paid plan gets you more features.)
Closing thoughts
I’ve just published the blog and uploaded a few posts I’d already written, and then put together this quick summary of how I built it with Framer.
The blog I wanted to make with Framer was simple. But to build even something this simple, I searched YouTube, Google, and elsewhere, and there was surprisingly little information, so it wasn’t easy.
The detailed design work in the process I described isn’t hard once you learn Framer itself, so I focused on the parts you might miss even if you can do the design. If you’re a designer who found this post while trying to build a blog with Framer, I hope it helped a little.
When building a blog, let’s not forget that what matters most in the end is “writing content”…
As someone who hasn’t been able to properly use the layout I designed because there isn’t enough content yet, I’m still not fully happy with how things look. But once there’s more content, the layout I originally intended can come through, so I’ll end this post with a promise to keep writing. Thank you for reading this long post!
This post was translated from the original Korean version. Read in Korean